Pond Drawing
Life can get pretty occupied and upsetting on occasion, so at times it tends to be extremely restorative to dial back and loosen up by a flickering pond. There's a feeling of smoothness around a pond that can meaningfully affect you, and frequently they will try and have some fish to respect in them!
Note: After learning this tutorial visit more Cool Drawing Ideas.
One doesn't necessarily get to visit a pond when it would be generally required, so figuring out how to draw a pond can be the best thing. This instructional exercise will show you how you can make your peaceful pond with no disappointment! Sit back, unwind, and partake in this bit by bit guide on the most proficient method to attract a pond's 6 stages that we have arranged for you.
Stage 1 - Pond Drawing
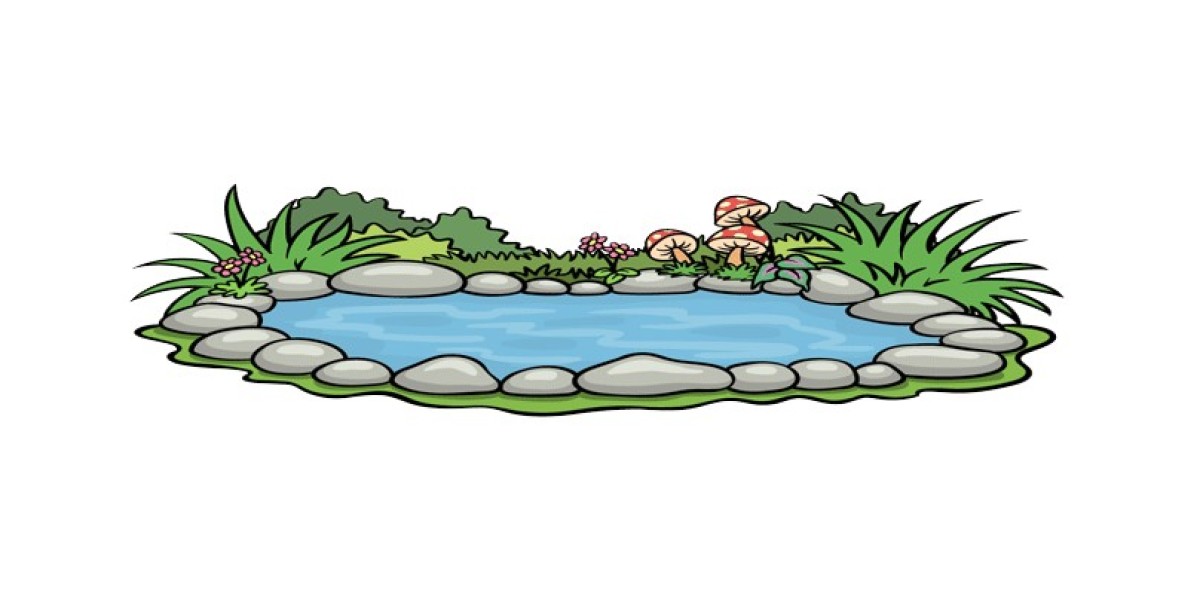
The pond that we will draw today will have a decent line of stones around it to add to the quiet environment of the scene. These stones are what we will begin within this initial step of our aid on the most proficient method to draw a pond. We will keep it somewhat basic as we start on this angle, and you should simply draw five adjusted, genuinely level states of fluctuating sizes. Whenever you have drawn these stones, you will be prepared to continue on toward the subsequent step!
Stage 2 - Next, draw a few additional stones for the border of the pond
Since you have begun the layout of your pond drawing, we can continue to add to it in this step. In the first place, we will add a few additional stones to the border of the pond. For this picture, you can add four to the left-hand side of the line that you began already, and afterward four erring on the right. The stones ought to be situated so that they bend up a little, and the stones you're drawing on the right will be a piece grouped up. At long last, to polish off this step you can define a wavy boundary going under the lines of stones to make a kind of green base for them.
Stage 3 - Draw the highest point of the side of the pond in this step
We will keep adding to the border frame in this third step of our aid on the most proficient method to draw a pond. To do this, we will be following a comparable arrangement as we have been for the past two stages, and that implies drawing more shakes. These stones will assist with making the total diagram of the pond, as displayed in the reference picture.
These stones will have somewhat more detail to them, notwithstanding, and you can do this by drawing a few bunches of grass and roses onto them. These subtleties are little, yet they truly add a great deal to the picture all in all! In the subsequent stage, we will add significantly a greater amount of these plant subtleties, so when you are prepared we will continue!
Stage 4 - Presently, draw some more vegetation around the pond
As guaranteed in the past piece of your pond drawing, we will add some more plant subtleties to the image in this part. For our reference picture, we added a few additional little blossoms alongside a few bigger shrubs by utilizing a few strongly bended lines. We likewise added a few additional bunches of grass and afterward drew a few huge mushrooms for an additional tomfoolery detail. Go ahead and add considerably more little plants and subtleties before we continue on toward the last subtleties and contacts in the following part!
Stage 5 - Draw some last contacts for the pond
This fifth step of our aid on the most proficient method to draw a pond will see you adding some last contacts and subtleties. You will likewise get an opportunity to add a few additional subtleties of your own! Before that, how about we polish off the last subtleties that we have in our picture? You can utilize a few wavy lines to make the states of certain shrubs behind the scenes.
That will polish off the enumerating that we set out for you, however as we referenced you can likewise add your very own portion! It very well may be a tomfoolery contact to draw some charming fish inside the pond, or you really might have a duck drifting on it. These are only a couple of straightforward thoughts, however, what might you add to this pond to polish it off?
Note: Learn the latest drawing tutorials of Drawing ideas blog.
Stage 6 - Polish off your pond drawing with some tone
For the last piece of your pond drawing, we will polish it off for certain beautiful tones! We involved a huge assortment of brilliant and bright varieties in our reference picture, and these included blues for the water, grays for the stones and bunches of green and red for the grass and plants. These are some variety ideas that you could use for your own picture, yet you ought to likewise go ahead and utilize whatever other varieties that you would like for it!
Then, at that point, whenever you have picked your varieties you can then pick which craftsmanship mediums you will use to rejuvenate them. For peaceful scenes like this, watercolor paints can be perfect for an all the more smooth inclination to the image. On the other hand, more brilliant mediums like hued markers and acrylics can help for colors that pop off the page.