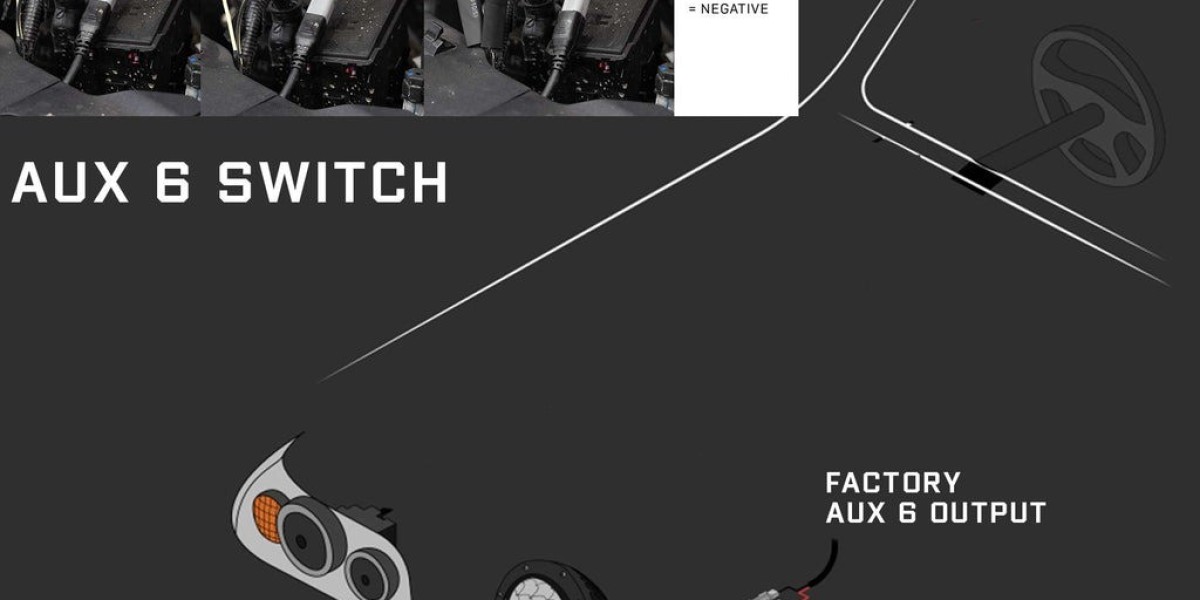
When it comes to upgrading your off-roading experience, nothing compares to the power and precision of the Next-Gen Ranger Spotlight. Whether you're a seasoned adventurer or a casual weekend warrior, adding a spotlight to your Ranger can dramatically improve visibility in low-light conditions. This guide will walk you through everything you need to know about Next-Gen Ranger Spotlight wiring, from installation tips to safety precautions.
Understanding the Importance of Spotlight Wiring
A spotlight isn't just a nice addition to your vehicle; it's a functional tool that enhances your driving experience, especially in rugged terrain where visibility is limited. Proper wiring ensures that the spotlight operates smoothly and integrates well with your vehicle’s electrical system. By understanding the wiring setup, you can prevent potential issues such as overheating or electrical shorts.
Tools You’ll Need for Wiring Your Spotlight
Before you begin, make sure you have all the necessary tools at hand. These will ensure that your wiring setup is efficient and professional. Here's a quick checklist of the items you’ll need:
- Spotlight kit (including the light, bracket, and mounting hardware)
- Wrenches and sockets
- Electrical tape and zip ties
- Wire cutters and strippers
- 12V power supply (relay)
- Fuse
- Drill (for mounting if necessary)
- Multimeter (for checking the electrical connection)
- Screwdriver
Having these tools ready will help you complete the installation process without any hiccups.
Step-by-Step Guide for Installing Next-Gen Ranger Spotlight Wiring
1. Mounting the Spotlight
Start by mounting the spotlight in a position that gives you maximum visibility. Common locations are on the front bumper or the roof of the vehicle. Depending on your preferred location, you may need to drill holes for mounting brackets.
2. Routing the Wiring
After the spotlight is securely mounted, the next step is to route the wiring. You want to choose a path that avoids sharp edges or hot surfaces to prevent wear and tear on the wires. Many off-road enthusiasts route their wires through the vehicle’s firewall, ensuring the wiring is tucked away safely.
3. Connecting the Spotlight to the Power Source
The spotlight will need to be connected to your vehicle’s 12V power source. This is usually done via a relay and fuse to ensure the spotlight receives sufficient power without overloading your system.
Relay Wiring
A relay serves as a switch to allow the spotlight to draw power from the battery without draining the electrical system. Connect the relay's power terminal to the vehicle's battery. The control terminal is then wired to a switch inside the vehicle (this could be a toggle switch or a push button). Use a fuse near the power terminal to protect your electrical components from potential surges.
Switch Wiring
Next, connect the switch to the control terminal of the relay. Mount the switch in an accessible location inside your vehicle for easy operation while driving.
4. Grounding the Spotlight
To complete the circuit, you’ll need to ground the spotlight. Find a clean metal surface on the vehicle and connect the ground wire to it. Ensure that the ground connection is secure to prevent any power issues.
5. Final Testing
Once everything is wired up, it’s time for a test. Turn on the vehicle and activate the spotlight using the switch inside the cabin. Check for proper functionality, ensuring the spotlight illuminates as expected.
Troubleshooting Common Spotlight Wiring Issues
While spotlight wiring is relatively straightforward, a few issues may arise during or after installation. Here are some common problems and solutions:
- Spotlight Not Turning On: Check the fuse and relay to ensure there are no blown fuses. Verify that all wiring connections are secure.
- Flickering Spotlight: If the spotlight flickers, this could indicate a poor ground connection or a weak power supply. Double-check all connections.
- Spotlight Overheating: Overheating can occur if the spotlight is drawing too much power. Ensure that the relay and fuse are rated correctly for your spotlight's power requirements.
Safety Precautions for Spotlight Wiring
Working with electrical systems can be dangerous if not handled properly. Here are some important safety tips to keep in mind during the wiring process:
- Always disconnect the vehicle’s battery before working on the electrical system to prevent accidental short circuits.
- Use a fuse rated for the power of your spotlight to prevent overloading.
- Check that all connections are tight to avoid short circuits.
- Use electrical tape and zip ties to secure any loose wiring to prevent them from coming into contact with hot surfaces or moving parts.
Conclusion: Enhance Your Off-Road Adventure with Proper Spotlight Wiring
Wiring a Next-Gen Ranger Spotlight is a rewarding upgrade that adds both functionality and safety to your off-roading experience. With the proper tools, installation steps, and safety precautions, you can enjoy clear visibility during your night-time adventures. Remember, careful planning and attention to detail during the wiring process will ensure that your spotlight operates reliably for years to come. Whether you're navigating through trails or exploring new terrain, your Ranger will be better equipped with a properly installed spotlight system.


