A robust and efficient financial management system is crucial for success in today's fast-paced business environment. QuickBooks Online helps you manage your finances, track expenses, and streamline your financial operations.
However, the process of migrating your existing data to QuickBooks Online can seem daunting, and you may wonder how do I export entire data to QuickBooks Online.
This step-by-step guide will walk you through the process of exporting your entire data to QuickBooks Online, ensuring a seamless transition and enabling you to leverage the full power of this powerful platform.
Step-by-step Guide for Data Export Process
Exporting data to QuickBooks Online involves several key steps, each designed to ensure a smooth and efficient transition. From preparing your data to formatting it for import, this guide will provide you with the necessary knowledge and tools to confidently navigate the process.
Step 1: Preparing Your Data for Export
Before you can begin the export process, whether you want to Convert QuickBooks Online to Desktop or from QBDT to QBO, it's essential to ensure that your data is organized and ready for migration. This step involves:
- Reviewing Your Data: Thoroughly review your existing financial records, invoices, bills, and other relevant data to identify any discrepancies or inconsistencies that may need to be addressed.
- Cleaning and Formatting: Ensure your data is consistent, with all necessary fields populated accurately. This may involve tasks such as standardizing date formats, removing unnecessary characters, and ensuring that all accounts and customer/vendor information is up-to-date.
- Backing Up Your Data: Create a comprehensive backup of your existing financial data, ensuring you have a secure copy in case of any issues during the export process.
By preparing your data, you'll minimize the risk of errors or data loss during the migration to QuickBooks Online.
Step 2: Choosing the Right Export Method
There are several ways to export your data to QuickBooks Online, and the method you choose will depend on the size and complexity of your financial records. Consider the following options:
- Manual Export: For smaller businesses with relatively simple financial data, a manual export process may be the most straightforward approach. This involves exporting your data to a CSV or Excel file, which can then be imported directly into QuickBooks Online.
- Third-Party Tools: If you're using a different accounting software or have a more extensive dataset, you may want to explore third-party data migration tools. These specialized applications can often automate the export process, ensuring a more seamless transition to QuickBooks Online.
- QuickBooks Online Import Tools: QuickBooks Online offers built-in tools and features to facilitate the import of data from various sources, including Excel, CSV, and even other accounting software. This can be a convenient option for those familiar with the QuickBooks ecosystem.
Evaluate your specific needs and the complexity of your financial data to determine the most appropriate export method for your business.
Step 3: Exporting Data from Your Current System
Once you've chosen the export method, it's time to begin the process of extracting your data from your current system. This may involve:
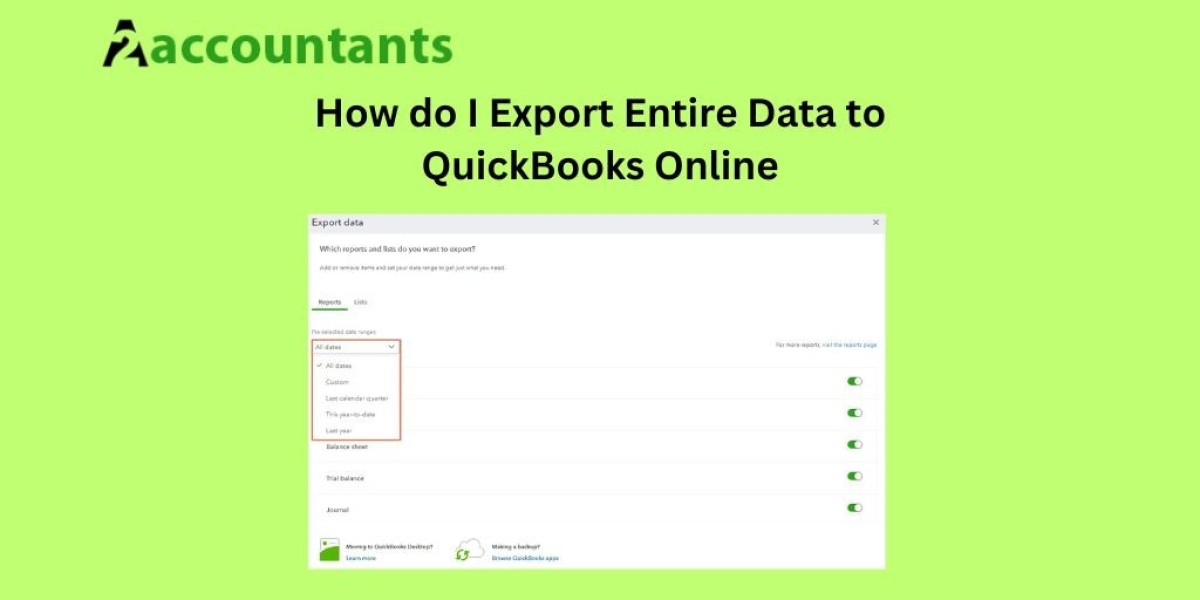
- Generating Reports: Depending on your current accounting software, you may need to generate specific reports or export files that can be used as the basis for the QuickBooks Online import.
- Exporting to a File: Follow the instructions provided by your current software or the third-party data migration tool to export your data to a file format that can be easily imported into QuickBooks Online, such as CSV or Excel.
- Verifying the Exported Data: Carefully review the exported data to ensure that all the necessary information has been captured accurately and completely.
Ensure that you have a clear understanding of the export process for your specific software or tool, and take the time to double-check the exported data to avoid any issues during the import into QuickBooks Online.
Step 4: Formatting the Exported Data for QuickBooks Online
Before you can import your data into QuickBooks Online, you'll need to ensure that it's formatted correctly. This may involve:
- Mapping Data Fields: Identify the corresponding fields in QuickBooks Online for each piece of data in your exported file, and ensure that the fields are properly aligned.
- Standardizing Data Formats: Ensure that all data, currency, and other relevant data formats match the requirements of QuickBooks Online.
- Organizing Data Hierarchy: Arrange your data in a logical hierarchy, such as grouping transactions by customer, vendor, or account, to facilitate a seamless import into QuickBooks Online.
By taking the time to properly format your data, you'll minimize the risk of errors or data loss during the import process.
Step 5: Importing the Data into QuickBooks Online
With your data prepared and formatted, it's time to import it into QuickBooks Online. This process may vary depending on the export method you chose, but it generally involves the following:
- Navigating to the Import Function: Within QuickBooks Online, locate the import function, which is found under the "Tools" or "Settings" menu.
- Selecting the Appropriate File: Choose the exported file or files that you prepared in the previous step, ensuring that the file format is compatible with QuickBooks Online.
- Mapping Data Fields: If necessary, map the fields in your exported data to the corresponding fields in QuickBooks Online, following the guidance provided by the software.
- Reviewing the Import Summary: Carefully review the import summary to ensure that all data has been transferred correctly and address any errors or discrepancies that may arise.
Once the import process is complete, take the time to review your data in QuickBooks Online, verifying that all transactions, accounts, and other financial information have been accurately transferred.
Conclusion
By following this step-by-step guide, you've successfully exported your entire data to QuickBooks Online, paving the way for a more efficient and effective financial management system.
Hopefully, you are no longer thinking how do I export entire data to QuickBooks Online. With your data centralized and accessible through the cloud-based platform, you can now leverage the full power of QuickBooks Online for long-term success.