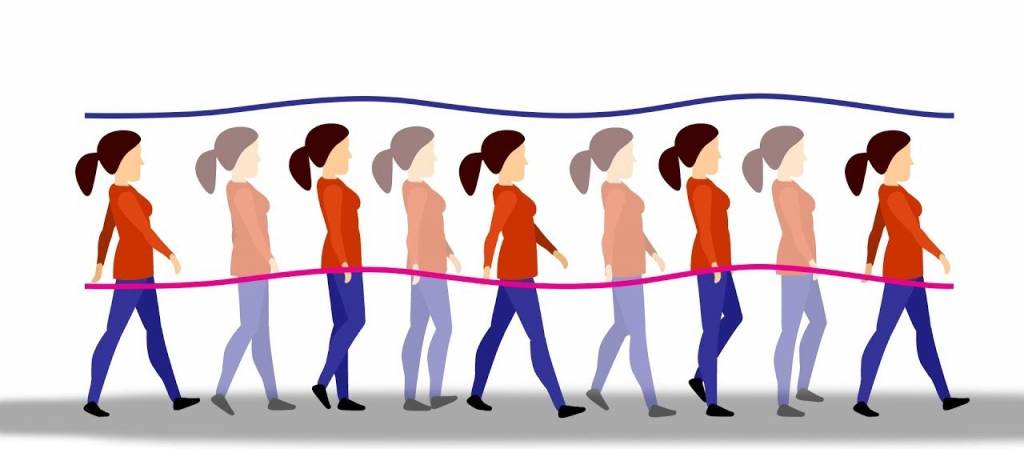
Though walking might be an ordinary human function, the credit lies in the hands of animators as to how perfectly they can replicate it with a right angle and projection.
Walk cycle animation

A walk cycle is a simple animation technique with which a sense of movement can be created by putting a series of illustrated frames to use. There are a series of drawings of a walking figure, which when combined, give the effect of walking movement to the animated figure.
It is an essential part of animation as it helps in visualizing the basics of human movement and making it look natural can be difficult without the right method and requires a lot of practice. A character walk cycle conveys much more than the movement of a character such as their gait, walking pace, and body language.
Do proper research
Search for already existent walk cycle reference to get an idea or outline of the style of animation you aim to recreate. Taking inspiration from a fellow animator or artist’s video can also help in creating a pretty good walk cycle. Since there is an idea of how the finished product should look, you can sketch it accordingly to reach your goal.
How many frames is a walk cycle?
A walk cycle is traditionally composed of 8 frames of animation. However, more recent walk cycles have been created with fewer or more frames, depending on the style and needs of the project. For example, a walk cycle for a video game might be composed of 12 frames to allow for smoother movement.
Poses to perfection
You must NAIL the four aforementioned primary poses:
- Forward Contact Point.
- Recoil or Passing Pose One.
- BackContact Point.
- TheHigh Point or Passing Pose Two.
Movement of a body
In Walking Animation, many compare the figure’s body to a chain reaction since all parts of the sequence are linked together. It is humanly impossible that they move synchronically, that is if you are taking a human approach with your animation.
For this reason, all main movements must start in the pelvis or torso while the rest of the body is “lagging” behind. Motion Design School suggests that hands should be 2-3 frames behind the leg.
2D

2D walking animations usually involve sketches and illustrations. You’ll need to scan these creations into a computer to animate them digitally or you could use traditional Cel painting techniques to animate frame-by-frame.
3D

3D techniques involve animating a 3D character within software. For this method, you’ll need to build your figures in a digital 3D render.
Creature
Creature walking cycles use similar processes to human animations. However, depending on the creature in question, you might find that you have to animate four legs, eight or even more.
Draw the passing position
This movement should appear as a seamless continuation of your forward point. The front leg should be heading backwards and the back leg lifted, heading forwards.
Animate the body
Arms swing when we walk, heads bob and torsos bounce. Getting all these little movements in will make your walk seem more natural and believable.
Add bend and weight
Your character’s weight will affect how they move. Make sure you’ve accommodated this in your illustrations. Consider how your figure’s knees will bend, how their hips will rotate and how their feet will absorb the impact as they meet the ground.
Conclusion
This is where your legs have completed their crossover. The original front leg should be at the rear of the body, slightly lifted. The original back leg is firmly planted in front. Repeat the crossover process, but in reverse.


