If you are not sure of how to remove junk file in MacBook, then go through the segment where you will uncover a powerful method that will immediately delete junk files in MacBook.
Mac is popular because it requires less maintenance for its cleaning. It fulfills the expectations to a certain extent but beyond that, it requires cleaning session to prevent the junk files from obscuring the essential files and folders. Overtime, they will build up on Mac and their presence can ever more affect the performance of a Mac system. Therefore, it is important to resolve the issues as quickly as possible because neglecting it may slow down the machine.
But how to delete unwanted files in MacBook let us understand the process in detail.
How to Remove Junk File in MacBook?
The easy procedure to remove junk file in MacBook is MacMister Data Wipe for Mac Tool. It has dual options with the help of users can load necessary junk files/folder on the application and discard them permanently without any issues. The interface of the software is user-friendly, thereby all professional and non-professional users can utilize the application with ease. Even, the three-operational steps will finish the process quickly.
Moreover, the application is programmed with plentiful features so that users may apply them according to the requirements to remove junk file in MacBook accordingly. However, users can explore all the features and options in detail by downloading the free demo version of the tool.
Working Steps to Remove Junk File in MacBook
Step 1. Download and run MacMister Data Wipe Software for Mac on Mac OS.

Step 2. You can take support of Add File(s) button to add required files on the application or click on the Add Folder button if you want to upload the entire folder carrying unlimited junk files on the tool. Click Next.

Step 3. Go through the files listed, verify them and again click Next button to continue.

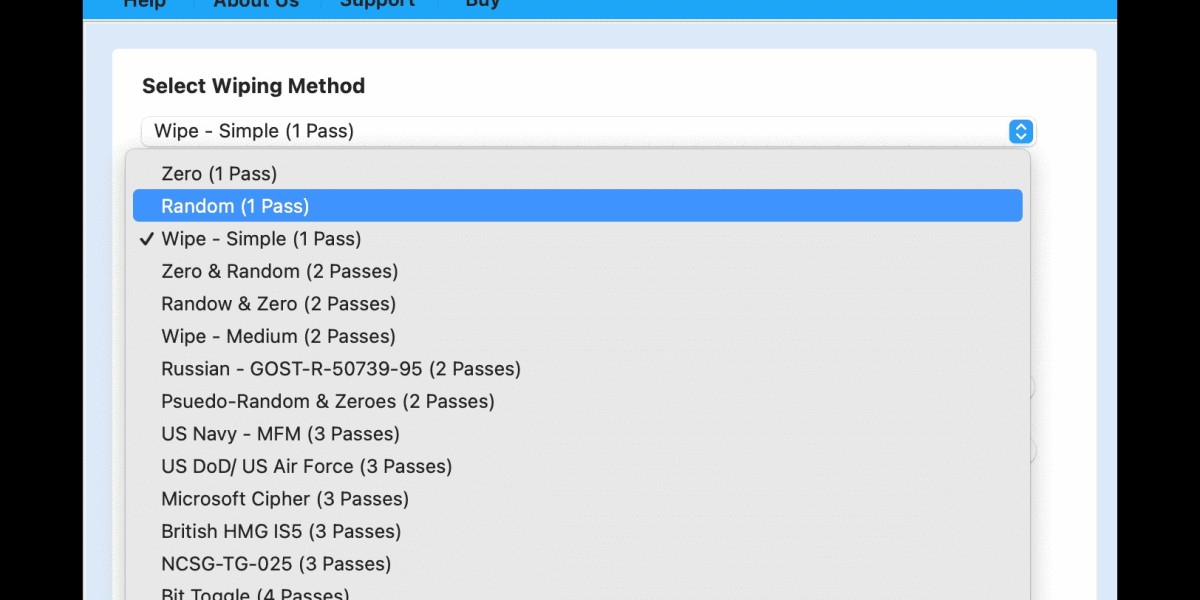
Step 4. Now, click the Select Wiping Method to choose the required wiping option from the list.

Step 5. Use the necessary filter option to perform filtered wiping, if needed and click Wipe button.

Step 6. The Data Wiping Process will start and the live wiping progress will appear on the screen.

The complete task will end with a notification confirming that the tool has successfully deleted junk files from MacBook. Click OK and go through the summary report appearing on the screen to cross-check the data wipe details.
Why to Prefer MacMister Data Wipe for Mac Tool?
MacMister Data Wipe Software for Mac is a brilliant solution for removing junk files in MacBook. It provides many features that allow users to delete junk files according to specific requirements, some of them are –
- Capable to permanently delete junk files from MacBook in few seconds.
- Includes dual options such as Add File(s)/Add Folder to add required junk files/junk files folder on the tool.
- Variety of wiping methods available i.e. Zero (1 pass), Random (1 pass), Wipe-Simple (1 pass) and more to wipe junk files accordingly.
- Advance Filter options are present for filtered wiping such as overwrite data text, date range, and file mask.
- Shows live wiping progress to track the ongoing wiping status of junk files.
- Works on the entire range of Mac OS versions i.e. Mac OS Sonoma, Ventura, Monterey, Big Sur, Catalina, etc.
Conclusion
In the article, we have tried to provide the best method to resolve “how to remove junk file in MacBook”. MacMister Data Wipe Software for Mac allows loading necessary files/folder on the tool and enabling users to permanently delete them from MacBook to create more space for new data. The application has a friendly environment so that all professional and non-professional users can operate the app independently and perform the required process in minimum time. Moreover, the features of the software will help users to erase junk file in MacBook according to specific preferences. Download the free demo to understand the wiping steps for free.